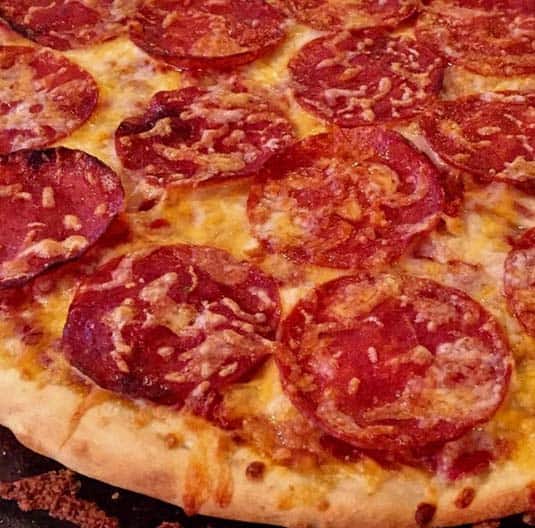
You will love this easy Better Than Domino’s Pizza Dough Recipe. Pizza from a chain restaurant can seem like an inexpensive dinner choice, but you’ll save big if you learn how to make your own pies.
Chain restaurant pizzas tend to be made with processed ingredients, but you can make your own fantastic, authentic, hand-tossed cheese pizza with all organic ingredients for much less than the cost of a takeout pizza.
The first time I made a homemade pizza, I was dumbstruck by how much better it was than delivery pizza. The improvement in flavor was like comparing a home-grown summer tomato to one of those hard, pink, grocery store varieties – worlds apart.
After I took a pizza baking class from my local Slow Food chapter at the Whole Foods bakery, I was hooked. The professional bakers taught us some tricks for making amazing homemade pizza, and now I’m going to share them with you – along with everything else I’ve learned about cooking pizzas nearly every week in a home oven.
If making homemade pizza sounds like a lot of trouble, I’m going to share our simple method—and you don’t need any fancy ingredients or equipment. I prepare the dough ahead and freeze several batches so we can have fresh pizza whenever we like.
I can easily prepare a homemade pizza faster than one can be delivered from one of the pizza chains. Best of all, even though we use all-organic fresh ingredients it’s less than a third of the cost of a delivery pizza.
No Fancy Equipment Needed
I’ve experimented with different techniques, and I keep coming back to simply shaping and baking the pizza on a plain old round metal pizza pan. I bought ours at Bed, Bath and Beyond for $10 about ten years ago, and it cooks the pizza perfectly–browned and crispy on the bottom, and chewy on top.
The first step is preparing the dough. I’ve included two recipes here. The first is a variation on the recipe we learned from the professional bakers, and it takes 24 hours from start to finish so you do have to plan ahead.
The base of the recipe is a Poolish, or “sponge” that you make one day ahead. This pre-fermenting step allows more time for yeast and enzymes to develop starch and proteins in the dough, which in turn creates greater complexities of flavor.
The dough also goes through several steps of rising and kneading. The resulting crust is fantastic – crisp and slightly chewy, similar to what you might get in a great wood-fired pizza restaurant.
The second recipe, which is based on The Pioneer Woman’s, can be prepared on the same afternoon you have a hankering for homemade pizza. The dough is softer and slightly less chewy, but it’s still a hundred times better than delivery pizza crust.
Both recipes call for bread flour, which has a 12 to 14 percent protein content and will make the nice, elastic dough that creates great pizza crust. But if you don’t have bread flour, don’t worry! Just use all-purpose flour and it’ll turn out fine.
Also, you’ll save a ton of money if you pick up a bag of all-purpose instant yeast instead of using those little packets. The recipes below will work just fine with either type of yeast.
I freeze unbaked pizza dough by separating it into half-pound balls. After flattening the balls slightly, I freeze them on a parchment-lined baking sheet.
Then I store the them in individual zip-lock plastic bags that I’ve brushed with a little olive oil. I thaw the dough in the refrigerator 24 hours prior to cooking, or on the counter for about an hour prior to cooking. (To reuse the bags, just tuck them back into the freezer until the next time you make pizza dough.)
Are you ready to get started?

Homemade Pizza Dough Recipe #1
Note: You need to start this recipe 24 hours before you want to bake pizza. For a same-afternoon pizza, see recipe #2 below.
Poolish:
- 1 1/4 cups bread flour (or substitute all-purpose flour)
- 3/4 cup water at 70 degrees F
- 1/4 teaspoon instant dry yeast
In a medium bowl, mix together all ingredients until well-blended. Cover and let sit at room temperature for 12 to 18 hours.
Pizza Crust Recipe:
- 3 1/2 cups bread flour (or substitute all-purpose flour)
- 3/4 cup spelt or whole wheat flour (or just use additional bread or all-purpose flour)
- 1 3/4 cup hot water at 140 degrees F, or as hot as you can get it from the tap
- 1 3/4 teaspoons sea salt
- 1 1/2 teaspoons instant dry yeast
- 2 tablespoons extra-virgin olive oil
- 1 1/2 teaspoons honey
- 1 recipe Poolish (see above)
Combine the flours, hot water, salt and yeast by hand, just until incorporated. Let the dough rest, covered, for about 30 minutes. Add the olive oil, honey and Poolish and mix by hand until incorporated, kneading for about 2 minutes. Let the dough rest again, covered, for another 30 minutes.
On a lightly floured work surface, knead the dough for 5 minutes:

Cover and rest for 20 minutes. Knead the dough for another 5 minutes, then cover and rest for another 20 minutes. Divide the dough into 4 or 5 pieces, lightly pre-shape into round pieces and cover and rest for 20 more minutes. Bake according to directions below.
Homemade Pizza Dough Recipe #2
This is a good all-purpose recipe for when you want to bake a homemade pizza that same night. The dough needs just one rise, and it’s ready an hour or two after you combine the ingredients. If you have a stand mixer with a dough hook, now’s the time to use it!
- 1 1/2 cups warm water
- 1 teaspoon dry yeast
- 4 cups bread flour
- 1 teaspoon sea salt
- 1/3 cup extra virgin olive oil
In a small bowl combine the warm water and yeast. Stir to combine and let sit for a few minutes, until bubbly. In a medium bowl (or the bowl of a stand mixer), combine the flour and salt. Using the low speed of an electric mixer or your hands, slowly drizzle in the olive oil and the yeast/water mixture. Mix until the dough comes together, like this:

Pull the dough into a ball and knead it for two minutes. If it’s too moist, add a little flour. If it’s too stiff, add a few drops of water. Continue kneading for two to three more minutes, until the dough is smooth and elastic.
Brush the bowl with a little olive oil, and place the dough inside. Flip it over to coat the bottom with oil, then cover with a damp dishtowel. Let the dough sit in a warm place for 1-2 hours or until doubled in volume:

Divide the dough in two equal pieces if you want a thicker crust, or into thirds if you want a thinner crust.
Easy Pizza Sauce Recipe
Most of the time, we want a simple, traditionally-flavored sauce with rich tomato flavor to top the pie.

Here’s a super easy recipe that nicely fits the bill:
- 2 cups tomato puree or 1 15-ounce can tomato sauce
- 1 6-ounce can tomato paste
- 1 tablespoon ground dried oregano
- 3 cloves fresh garlic, minced
- 1/2 teaspoon ground paprika
- sea salt and freshly ground black pepper to taste
In a medium bowl, mix together the tomato puree and tomato paste until smooth. Stir in the oregano, garlic, paprika, salt and pepper. Makes about 2 2/3 cups of sauce, or enough for 2 large pizzas.
For grown-up pizzas, you can simply pulse a can of drained, Italian San Marzano tomatoes in the food processor until they are lightly blended but still chunky. Season to your liking, and you’re good to go. Or skip the red sauce altogether, and try a drizzle of olive oil.
Cooking the Pizza
Preheat the oven to 550 degrees F or your oven’s highest setting, and put the oven rack right in the middle. If you have a convection setting, turn it on.
If you have a pizza stone you want to use, put it in the oven on the rack now and let it get nice and hot. If you don’t have a pizza stone, no problem – your pizza is still going to be crispy, chewy and GREAT.
Now, use your hands to pat and stretch the dough on lightly greased baking sheet to the desired shape and thickness. I don’t recommend using a rolling pin, because it will compress the dough and eliminate those wonderful air bubbles that give your pizza crust snap.
Initially the dough may keep pulling back, and it may seem like it will never fit the pan. But keep working with it, and in a few minutes it will relax and stretch out.
We like our pizza crust quite thin, so I try to stretch it as far out as possible without tearing the dough:

I like to bake the untopped pizza in the oven for three minutes to set the crust. This keeps the pizza from getting soggy when you add the sauce and toppings. Remove the pale, barely-baked crust from the oven:

Next, add your desired sauce. I tend to use more sauce when I’m making pizza for kids:

Finally, add your toppings. For some kids, this may mean simply a generous sprinkling of your favorite grated cheese. You can, of course, make the pie half-and-half for family members who like different toppings:

If you prebaked the pizza for three minutes, you can now easily slide it on a hot pizza stone if you like. I usually just leave it on the pan, but you may not be as lazy as I am.
Bake for 8 to 10 minutes if you’re baking it on the pan, or until the edges of the crust are a golden brown and the cheese is bubbly. (One of the things the professional bakers said in our class is, “Home cooks never cook their pizzas long enough.” So make sure the crust is good and golden brown before you take it out of the oven.)
Here’s a pie we made with half cheese, half Canadian bacon:

While the pizza is baking, I like to make a little garlic flavor for the crust. Just combine 1 tablespoon of melted butter or extra virgin olive oil with 1 clove of minced garlic:

Right when you take the pizza out of the oven, give the hot crust a quick brush with the sauce:

Cut and serve. (Don’t you love the red pizza cutter? It’s made by Microplane and we got it at Crate & Barrel – a very worthwhile splurge!)
Best Pizza Toppings
Here’s a pie we made recently topped with sliced fresh Roma tomatoes, fresh mozzarella slices, spinach and basil:

You likely have your own favorite combination of ingredients, but if you’re looking for fresh inspiration be sure to check out our giant list of best homemade pizza toppings.
I hope this long post will inspire you to bake some amazingly delicious pizza pies at home. Whether you regularly make homemade pizza or are ready to give it a try for the first time, you know we’d all love to hear your thoughts, questions, suggestions and experiences.
Ciao!
Save for Later
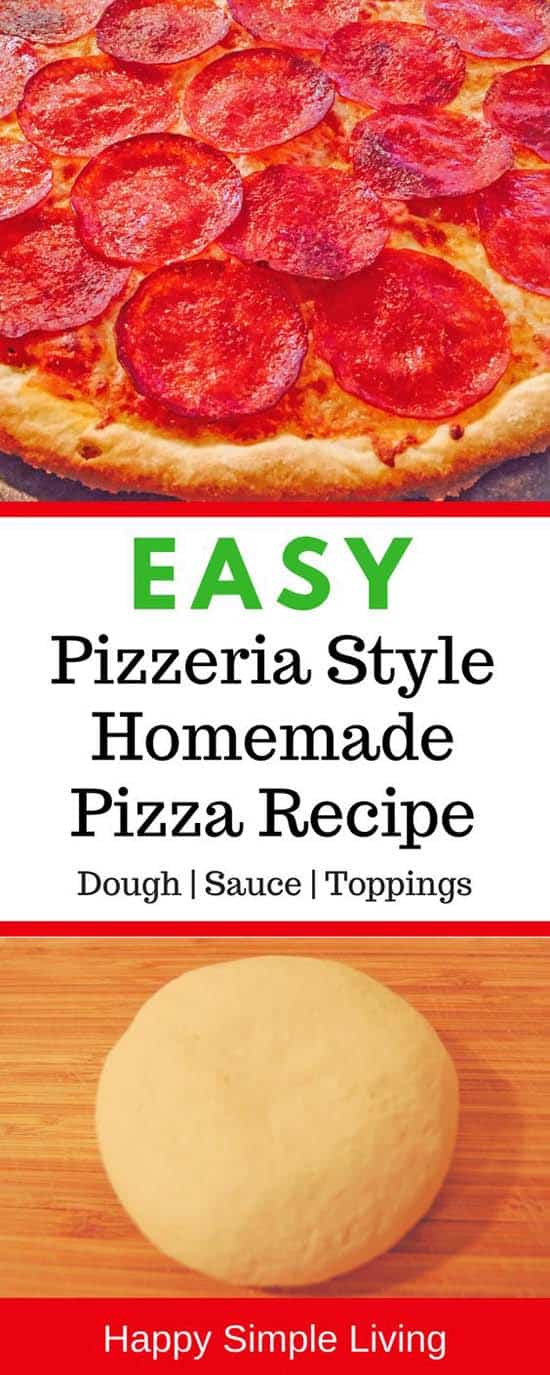
If you use Pinterest to save and share recipes, here’s a pin for this recipe:
About Eliza Cross
Eliza Cross is the author of 17 books, including Small Bites and 101 Things To Do With Bacon. She shares ideas to simplify cooking, gardening, time and money. She is also the owner of Cross Media, Inc. and founder of the BENSA Bacon Lovers Society.

")


Thanks for this pizza recipe you have shared. I cant wait to do this at home.
Good luck, Nora, and let us know how it turns out.
xo
I love making homemade pizza. And I love getting new dough recipes!
Thanks, Brooke – here’s to the joy of pizza making!
Thank you so much for sharing this! I can’t wait to try it.
Could you tell a little more about how you freeze the dough? For example, do you let it rise at all before you freeze it? Do you freeze the whole batch all together or separate it out for each pizza? Do you let it thaw and then pat it out?
Thanks again!
Rebecca,
I separate the whole batch of dough into half-pound balls, flatten them slightly and freeze them on a parchment-lined baking sheet. Then I store the balls in individual zip-lock plastic bags that I’ve sprayed with a little nonstick cooking spray. I thaw them in the refrigerator 24 hours prior to cooking, or on the counter for about an hour prior to cooking.
Thanks for your question and good luck with your pizzas!
xo
Making your own pizza from scratch at home is not difficult and can be done with ingredients that you probably have available or are easy to find. It takes a little time to make the perfect pizza from scratch, but the result is worth it.
I like your tutorial, I followed the steps and I liked the results. Yummy pizza anyone?
Thanks for taking the time to let me know, Vivian.
xo
I can’t wait to try it. Do you freeze the whole batch all together or separate it out for each pizza? Do you let it thaw and then pat it out?
Dear Perry,
This is a good question and I’m going to take some additional photos the next time I freeze pizza dough. In the mean time, see my instructions above in answer to Rebecca’s similar question. Happy pizza making!
xo
Homemade pizza is our regular Friday night dinner. I use the dough recipe from “Artisan Bread in Five Minutes a Day.” It’s a no-knead method. I describe it on my blog here: http://sewingwithoutzippers.blogspot.com/2012/03/homemade-pizza.html
Thanks for sharing this easy dough recipe, Kathleen!
Hi there! I went to this site last week and I was thankful for your recipe here. I’ve made my own flavored pizza from the left over ingredients at my fridge. I put some grated veges on top! And it’s great!
So glad you were happy with the recipe!
xo
I have never been successful in making pizza dough. I couldn’t make it rise. All those instant quick rising yeast in the grocery are not reliable. But I will never give up, there’s a local bakery store near our place and I’m hoping to get a fresh yeast there.
Good luck, Trisha, and let us know how the fresh yeast works for you!
I love this post! one of my favorite food is pizza and my Mom’s specialty is making homemade pizza.I will give this recipe to her and i can’t wait to try this. Thanks for sharing your recipe!
Thanks, Heidi, and I hope you enjoy the recipe. xo
Yummy! I do love to check it out and have my own to prepared… Love it.
Thanks, Ruby.
It’s hard to make a perfect pizza dough, but I do I just buy the ready to bake dough in the supermarket and that’s the time I make my own flavor pizza. I love to experiment different flavors. Sometimes I combine fruits and veges too! Have you tried Mango Pizza?
I’ve never tried Mango Pizza, but it sounds promising. What other ingredients do you top the pizza with besides the mango?
I love love pizza. I love finding new pizza recipes and trying them out. My husband does not like pizza as much as I do, So I only make it when I know he is not hungry or out of town. I love your blog , I will definitly have to bookmark this page. This is making me really hungry.
Quick question. The amount of warm water in the second
dough recipe is it 1 to a half cup of water or 1 and a half cup water?? I completely messed up my dough!! Got to sticky and moist and didn’t come out right
I’m so sorry to hear that. 🙁 The correct measurement of water is 1 1/2 cups water. This dough recipe is a little moister than the other recipe, but it sounds like your batch was too moist. Flour can vary so much, not only in how much moisture it contains but how compacted it is, so you may need to add a little more flour. I’ve adjusted the recipe to reflect that, and I hope your next homemade pizza is perfect! 🙂
In the oven. Can’t wait, it smells AMAZING! Thanks!
I made this pizza today. I didn’t have yeast so I used baking soda. For my toppings I used homemade hot pasta sauce, smoked turkey sausages, grilled onions, mozzarella, cheddar and parmesan cheese. This is my first time making pizza and my bf doesn’t believe I’ve never made pizza before! Delicious. I’m going to continue with different variations of this recipe. Never ordering pizza again. Thank you so much.
I’m so glad the pizza recipe was a success for you, Vanessa!
xo
I tried to follow the Pizza Dough recipe #1, but not sure what to do with the Poolish. I got the pizza crust, but there Is no instruction what to do with the poolish. How to incorporate them to the pie. Please help
Dear Dan,
The Poolish is started 12 to 18 hours before making the Pizza Dough #1, and it’s added to the dough mixture near the end along with the olive oil and honey. Good luck with your pizzas and let us know how they turn out!
xo,
Eliza
Hi, this seems really easy to make. Would definitely try it out this weekend.
However, can I use this recipe on a commercial scale? I am looking at opening a small pizza restaurant in my neighborhood. Or do have any other ideas I can implement?
Hey Eliza thanks for the recipe really lovepd it after trying but my dough didn’t really get doubled could you please tell me why??
Dear Saumya,
I’m glad you liked the recipe but I’m sorry to hear the dough didn’t rise completely. Some of the possible causes are:
*Yeast that has been stored awhile may not be as active
*If the water is too hot, it will kill the yeast
*If the water is too cold, the yeast won’t activate
*The dough needs to rise in a warm place, with no drafts
*If your water is highly chlorinated, it may kill the good bacteria. Next time you might try filtered or spring water.
Good luck and let us know how it goes!
xo,
Eliza
Came out great! thanks so much, it was a little saucy though – lol
HOw many pizzas does this make?
Pizza Crust recipe #1 makes 4 to 5 pizza crusts (depending on how thick you like it) and recipe #2 makes 2 to 3 crusts.
xo
Great pizza, Eliza. The info on how to make the pizza dough (the hardest part) was so perfect. We like the #2 best, as it is easy but still makes an excellent crust. We now keep about five in the freezer so that we can have pizza in just a few minutes after defrosting the dough. I thank you, my wife thanks you, and most of all, our kids thank you.
Tom
And I thank you, Tom! Thanks so much for taking the time to let me know you and your family like the recipe. 🙂
nice recipe but taking 2 much time 2 make it ahhhh
It’s tough to make it and wait for it to bake when you’re hungry. Where is the butler when we need him, right? 🙂
I was looking for a spinach pizza recipe and arrived here. I read the whole thing. I’ve just recently started making my own pizzas and I think I’ve learned some things from your “book” ;)…Thanks
Sarah, that’s great – hope you love your homemade pizzas! (I love using fresh spinach as a topping, too.) xo
Thank you for the recipe, i will certainly try it this weekend. I am just wondering how i will do it in a gas cooker.
Thanks!
Geraldine, if you are using a gas grill you can definitely make a great pizza. Just don’t put the pizza too close to the heat source and watch it carefully so it doesn’t burn. If you put the lid on for most of the cooking time it will get that yummy smoky flavor, too! Stop it, you’re making me hungry! Good luck, and let us know how your pizzas turn out.
Thankyou so much for this pizza recipe I’ve been looking for a simple and fast recipe to make for a lunch option and this recipe is great.I can’t wait to make it.But the only problem is, I don’t have a pizza stone or whatever its called,so what did you say we could bake the pizza on if you don’t have one?
Kana,
I’ve made a ton of pizzas on a plain old cookie sheet. Just pat and stretch the dough in place and cook. It will be great! I make a lot of pizzas on an inexpensive $9 round pizza pan I bought at Bed, Bath & Beyond, too. Good luck! Let us know how your pizzas turn out!
xo
Thank you so much for the recipe. I’ve just started making pizza on the grill. We like to make little personal pizzas, about 6″ in diameter. Is there a way to press out the dough ahead of time, so we can have 3 or 4 pizzas ready to go at once? Right now, we roll one out, patio it, put it on the grill, and its done before the next one is rolled out. Any ideas?
This is a great question, Sean. What I would do is roll out the pizza dough rounds and cook each one on the grill for about 2-3 minutes to set the dough, without any toppings. Then you can put the toppings on and slide them back on the grill when you’re ready to finish cooking. Hope this helps, and happy pizza making!
I am a sixteen years old guy and have almost no cooking experience, but wanted to do something from scratch for my family. I followed this recipe word for word and the results were simply fantastic! It was also very easy to follow even for a beginner. Thank you so much for this recipe!
Jitesh, your comment made me so happy. I’m so glad you’re enjoying making homemade pizzas! 🙂
Hi! Just read your post and was looking for an easy pizza dough recipe. It looks simple enough! When you say knead…do you mean hand knead or do you mean if I have a dough hook my machine will need for me?
Inesha, I’ve done it both ways and they both work great. Lately I’ve been lazy and have been using the dough hook on the mixer. 🙂
I really liked your instructions and having a convection over and the max I can set it is 500 degrees. For the first 3 minutes to “set” the pizza dough. It was perfect. However I found cooking the complete pizza at 500 was too high as the crust burnt on me. I had the timer set at 10 minutes, but thankfully checked it at 8 minutes.
Next time, I’ll drop the temp down to 475 or 450 which I think will turn out a great pizza.
Thanks for sharing your experiences, Rockee. I find that I have to experiment with timing depending on the crust thickness, too. I hope your pizzas are coming out great now. xo
I just wanted to thank you for the wonderful recipes on this site. I am a seasoned cook and love collecting and trying new recipes… : )
Thank you for your sweet comment, Deborah Ann. I’m glad you enjoy the recipes, and I love to try new ones, too! xo
One of the best treats ever is pizza on the grill. Have you done that? Pre-grill one side and then top the grilled side and put it back on to finish the bottom. So so so delicious. I can’t wait to make my own crust and try it again this summer! I’m glad I found this blog!
Adriane, I so appreciate your specific directions and I’m going to try grilling some pizzas the way you suggested when the weather warms up a bit. Thank you!!! xoxo
Yum!!! Those pizzas look fabulous. You know, I was wondering what you think. Is ordering a pizza frugal? How cheap would it need to be?
Seems like of the many food choices one may have, pizza is a pretty cheap one to me! 🙂
Awesome article,
Sam
HI,
I like your pizza recipe. I tried it last time but with store bought pizza sauce. After the pizza is baked, it tasted bitter. Do you think of any possible reasons? I used yeast packtes that said pizza yeast. I think I might have used more sauce.
Nice article..will try again this weekend.
AK
Are you using a Pampered Chef pizza stone at that high temp? I want to use my stone but I am not sure if that is too high.
Thank you Liz for giving me the ingredients for Pizza. I went through dozens of cites that gave me dough, dough and more dough. I have my dough, I wanted the stuff that goes on the dough and you finally gave it to me, I will be eating my favorite pizza which is cheese tomato sauce and sausage tonight. I can hardly wait. Thanks again and again.