

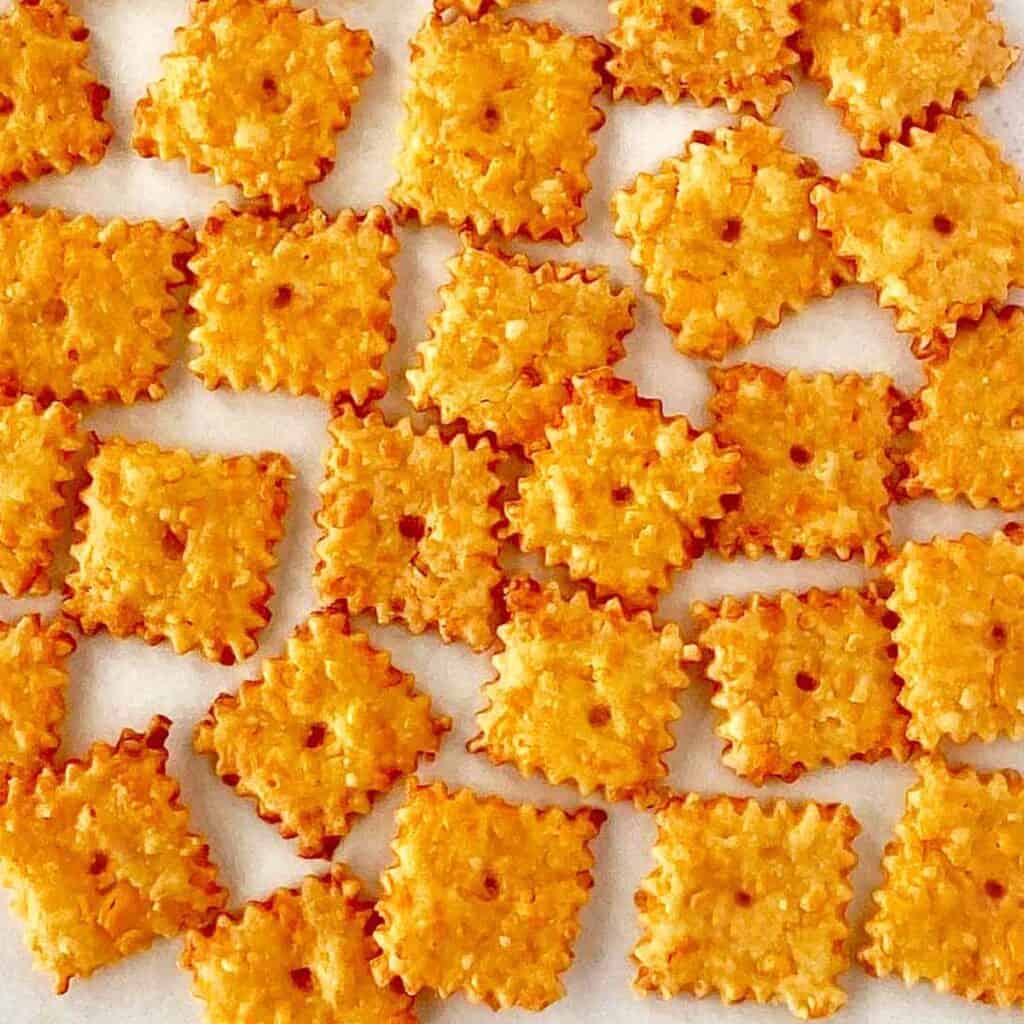
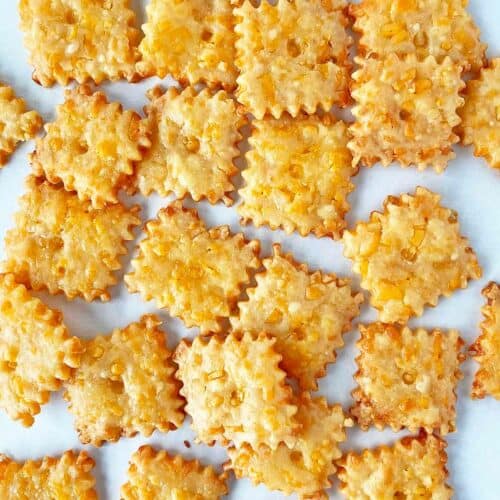
You’ll love this copycat Cheez It recipe! Homemade cheese crackers are easy to make and so much fresher than the store bought brand.
These easy Cheez-it crackers are perfect party appetizers, and they pair wonderfully with snacks like homemade tortilla chips, S’mores snack mix, brown butter pan roasted almonds and mini cheese balls with pretzel stick skewers.
I love to experiment with making the homemade version of store-bought foods, don’t you?
Why You’ll Love This Recipe
Delicious and Crunchy: The flavor of these DIY cheese crackers is amazing! Once you try them, you’ll be spoiled forever.
Easy to Make: The dough takes just 5 ingredients (plus a little ice water), and the crackers are super simple to cut and bake.
Natural Ingredients: Your cheese crackers won’t contain any preservatives or additives.
Freshness: These home-baked Cheez-Its are fresher than store-bought crackers that sit on the shelf for months.
Ingredients Notes and Substitutions
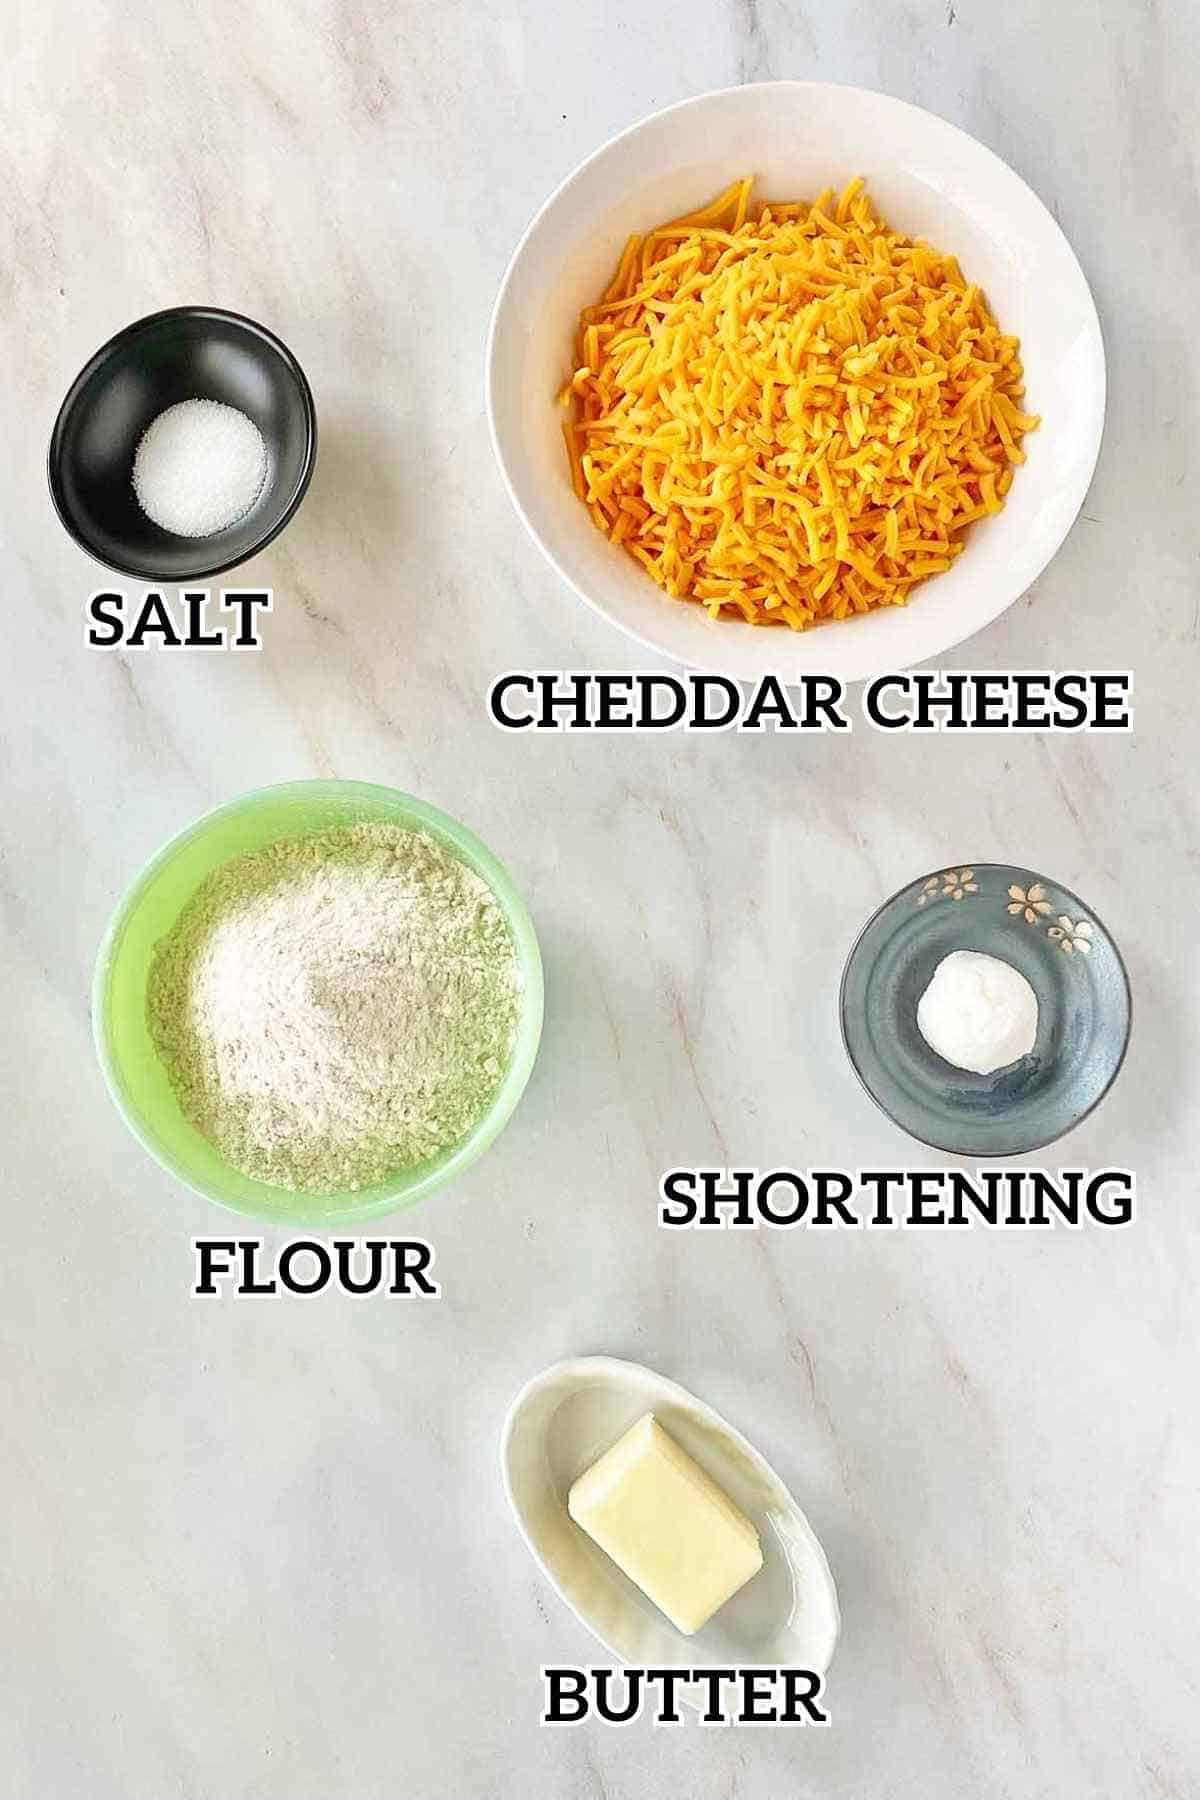
Here’s what you’ll need to make these tasty cheese flavored crackers:
Grated Sharp Cheddar Cheese: The flavor and quality of the cheese will greatly affect the taste of the crackers. We like to use a good quality sharp cheddar cheese for maximum flavor, and grate it by hand from a block.
You can substitute another flavorful cheese like Extra-Sharp Cheddar, Gouda, Monterey Jack or Swiss if you prefer. You can also use pre-shredded cheese if you’re short on time.
Salt: Sea salt has a clean taste and dissolves well in the dough. You can also use regular table salt.
All-Purpose Flour: Regular all purpose flour gives the crackers structure and texture. For a healthier mix, you can substitute whole wheat flour for half of the regular flour. See below for additional flours our readers have used.
Shortening: I add one tablespoon of vegetable shortening (I like Spectrum organic cold-press palm oil shortening) to this cheddar cheese cracker recipe. Vegetable shortening gives the crackers a crisp texture and helps to bind the dough together. If you prefer, you can use butter in place of organic vegetable shortening.
Unsalted Butter: Using unsalted butter allows you to control the amount of salt in the recipe. You can substitute salted butter; just reduce the amount of salt in the recipe by about 1/4 teaspoon.
Ice Water: Using ice water helps to keep the dough cool, prevents the butter from melting while blending the dough, and results in a crisp, flaky cracker.
Can You Use Other Flours Besides All Purpose?
After I posted this recipe, several readers wrote in to share their success with other flours:
- Tara made the crackers with King Arthur Gluten-Free baking flour.
- Tracy used brown rice flour and made the crackers for Passover.
- Sarah used white whole wheat flour.
- MN Mom used half whole wheat, half unbleached white flour.
Hurray! I love hearing about the ways you make a recipe your own, and your comments help all of us.
Equipment
Here’s what you’ll need to prepare this recipe:
- Stand mixer – Or you can use a food processor.
- Rolling pin
- Parchment paper
- Ruler
- Pastry wheel cutter – I like to use a pastry wheel cutter, which makes zig zag edges. You can also use a pizza cutter or a sharp knife.
- Skewer
- Baking sheet
Step by Step Directions
Note: The full, printable recipe can be found in the recipe card below.
Step 1 | Combine Soft Ingredients
Combine the cheese, butter, shortening and salt in a food processor or in the bowl of a stand mixer fitted with the paddle attachment.

Step 2 | Add in flour
Add the flour and pulse or mix on low speed until the mixture resembles coarse crumbs.

Step 3 | Add ice water
Add the ice water slowly with the mixer or food processor running. The dough will start to cling together.
You may need to add a few more drops of water, but go slowly so you don’t overdo it.

Step 4 | Divide and Shape Dough
Gather up the dough and divide it in thirds. Gently press each third into a disc that’s about 4 inches across. Don’t knead it or mess with it too much. You’ll be able to see pieces of cheese in the dough.

Repeat with the rest of the dough so you have 3 round discs.

Step 5 | Refrigerate Dough
Wrap the discs tightly in waxed paper or parchment and refrigerate for at least an hour, or until you’re ready to bake the crackers.
MAKE AHEAD TIP: The dough can be refrigerated like this for up to 5 days.You can also freeze the discs, tightly wrapped, for up to 2 months.
Step 6 | Roll Out Dough
Preheat the oven to 350 degrees F. Let the dough sit out at room temperature for about 20 minutes, and cut a piece of parchment paper to fit your favorite baking sheet. Gently begin to roll the dough out directly on the parchment paper. At first it may seem a little unyielding:

…but just take your time and press the cracks back together as you go.

Keep persevering, and roll the dough quite thin, to a thickness of about 1/8 inch.
Step 7 | Cut Crackers
Now it’s time for the fun part! Cut the dough into 1 inch squares. You can use a pastry wheel cutter, pizza cutter, or a sharp knife to do this.


Poke a hole in the center of each cracker with a skewer. Along with being decorative, the hole allows the steam to escape which helps your crackers bake up nice and crisp.

Use a sharp spatula to separate the crackers gently on the parchment paper and transfer the whole paper (scraps, too – perfect snacks for the chef!) to a baking sheet.

Step 8 | Bake Crackers
Bake the crackers for about 12 to 13 minutes, or until lightly browned around the edges. (Depending on how your oven cooks, your baking time may be more or less so watch the first batch carefully.) Cool the whole sheet on a wire baking rack and repeat with the remaining dough.
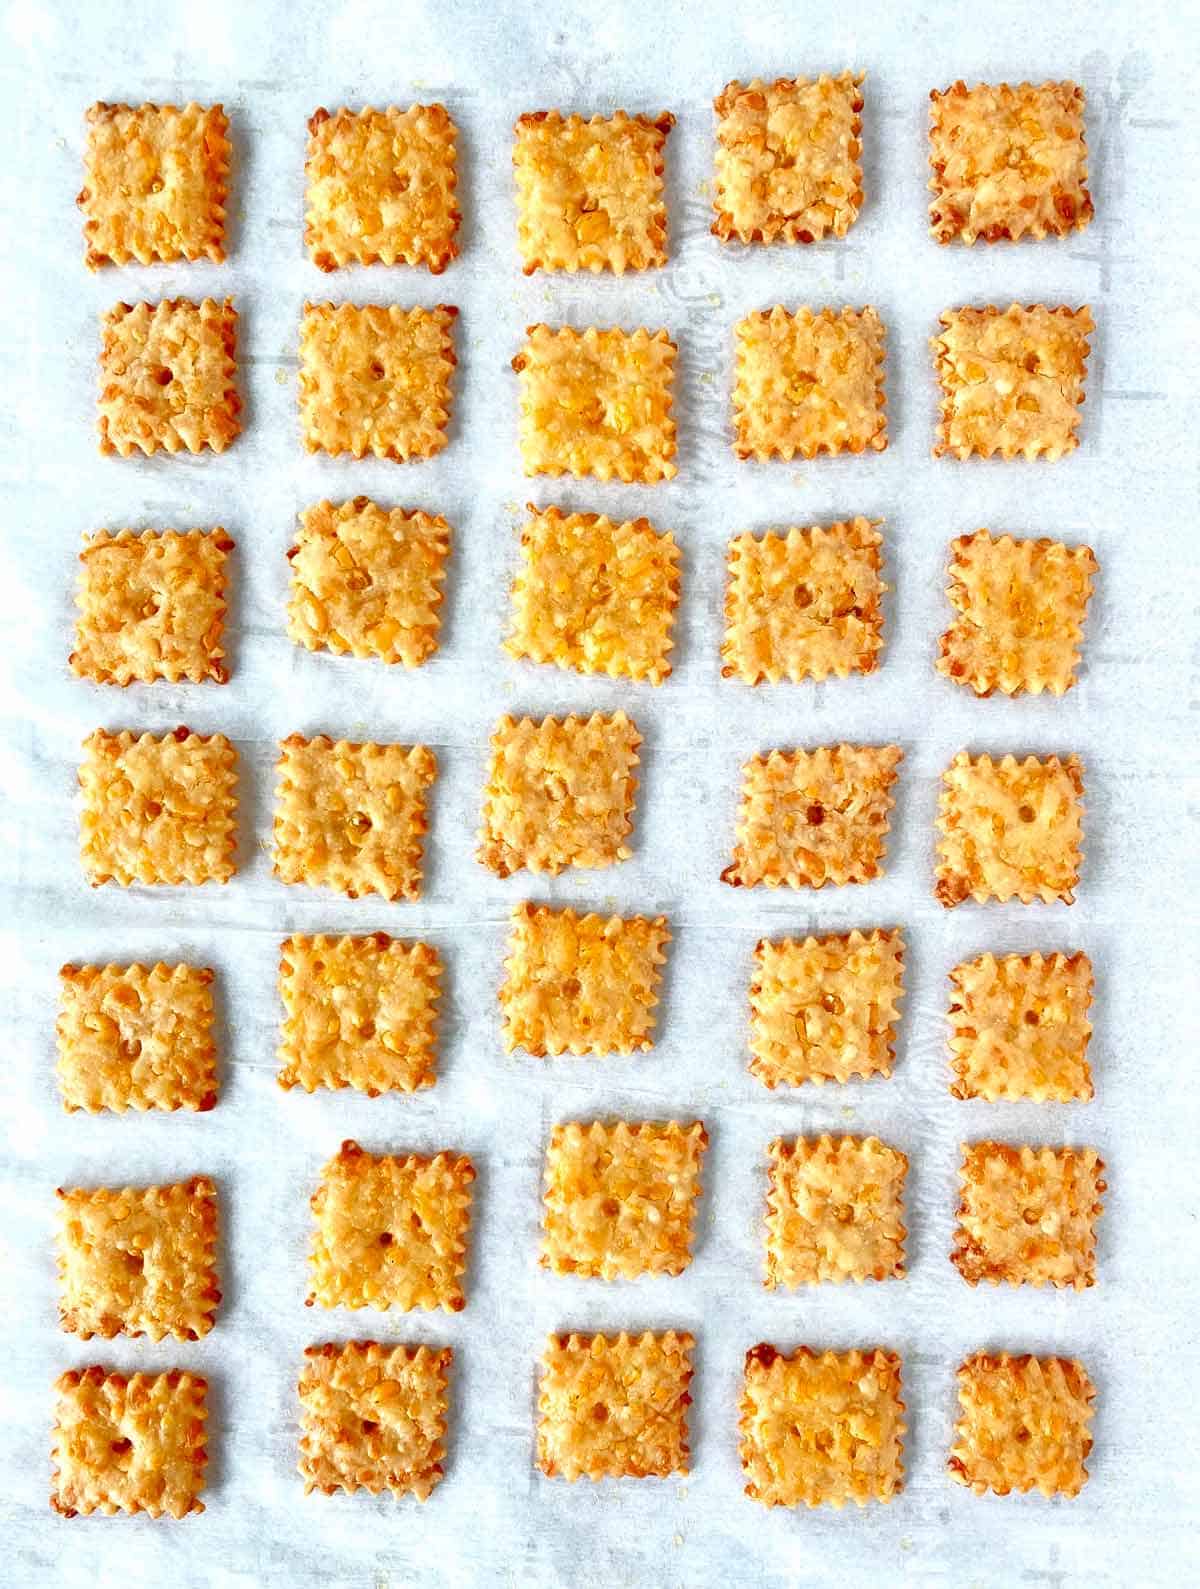
You can serve the crackers warm, or cool them completely and store them in a container with a tight fitting lid. If you’re going to store them for more than a few days, you can freeze the crackers in a container and just let them come to room temperature before eating them. They freeze really well.
This recipe makes about 7 to 8 dozen crackers. In our house, most of these disappeared within 45 minutes of baking!

Variations
Spicy Cheese Crackers: Add 1/4 to 1/2 teaspoon ground cayenne pepper to the dough at the same time you add the salt.
Sesame Cheese Crackers: Just before baking, sprinkle the cut cracker dough with sesame seeds, press lightly, and bake.
Gluten Free Cheese Crackers: A gluten free flour blend can be used in place of the all purpose flour. Just make sure your other ingredients are also certified GF.
What to Serve with Homemade Cheez-It Crackers

Charcuterie Board: Arrange cheese crackers on a board with an assortment of cheeses, cured meats, fruits, nuts, and spreads.
Dips and Spreads: Serve cheese crackers with dips like Cream Cheese Dip with Bacon and Onion, artichoke dip, or spreads like pimento cheese, olive tapenade, or cream cheese and smoked salmon.
Soups: Pair cheese crackers with soups like tomato soup, broccoli cheddar soup, beef chili or white chicken chili.
Fruit: Serve cheese crackers with fresh apples and grapes, or dried apricots.
Beverages: Serve cheese crackers as a savory snack with lemonade, mocktails, wine or beer.
Snack Mix: Combine cheese crackers with pretzels and nuts to create a savory snack mix.
Can You Freeze Home Baked Crackers?
Yes, these crackers freeze really well! Just wrap them tightly and freeze for up to 2 months. Let them come to room temperature before serving.
For just-baked flavor, spread the frozen crackers on a baking sheet and heat in a 350 degree oven until hot, about 5 minutes. Cool and serve.
Homemade Cheez It Crackers
Equipment
- stand mixer
- Rolling Pin
- Parchment paper
- Baking sheet
Ingredients
- 8 ounces grated sharp cheddar cheese
- 3 tablespoons unsalted butter at room temperature
- 1 tablespoon organic vegetable shortening
- 1 teaspoon sea salt
- 1 cup all purpose flour
- 4 tablespoons ice water
Instructions
- Combine the cheese, butter, shortening and salt in a food processor or in the bowl of a stand mixer fitted with the paddle attachment.
- Add the flour and pulse or mix on low speed until the mixture is combined and resembles coarse crumbs.
- Slowly add the ice water, 1 tablespoon at a time, with the mixer or food processor running, until the dough just begins to clump together. You may need less or more water depending on your ingredients and conditions.
- Gather up the dough and pat it into three disc shapes, about 4 inches in diameter. Try not to overwork the dough.
- Wrap the discs tightly in waxed paper or parchment and refrigerate for at least an hour, or until you’re ready to bake the crackers. The dough can be refrigerated like this for up to 3 days.
- Preheat the oven to 350 degrees F. Let the dough sit out at room temperature for about 20 minutes, and cut a piece of parchment paper to fit your favorite baking sheet.
- Gently roll the dough, patting edges smooth as you go, until it is about 1/8 inch thick.
- Using a ruler to measure, cut the dough into 1 inch squares. You can use a pastry cutter, pizza cutter, or sharp knife. Poke a hole in the center of each cracker with a skewer.
- Use a sharp spatula to separate the crackers gently on the parchment paper and transfer the whole paper to a baking sheet. Bake the crackers for about 12 to 13 minutes, or until lightly browned around the edges.
- Cool on the pan for about 5 minutes. Serve the crackers warm, or cool to room temperature. Makes about 7 to 8 dozen.
Notes
Nutrition

Eliza Cross is the creator of Happy Simple Living, where she shares ideas to help busy people simplify cooking, gardening, holidays, home, and money. She is also the award-winning author of 17 cookbooks, including Small Bites and 101 Things To Do With Bacon.


Hey there! I tried out the Homemade Cheez It Recipe and it was a total game changer. The flavors were spot on and it was a hit with everyone. Truly, you’ve outdone yourself with this one!
can I make this using almond flour ? (I’m new to using almond flour)
Peggy, I have not made this recipe with almond flour but the idea seems promising to me. The flour is more of a binder as the crackers contain a lot of cheese. You might have to be the guinea pig, and if you try it I’d love to hear how the crackers turn out. Fingers crossed! ~Eliza